The Best Gluten Free Waffles
This recipe for The Best Gluten Free Waffles is a delightful treat that everyone can enjoy. Perfect for breakfast or brunch, these waffles are fluffy on the inside and crispy on the outside, making them a favorite among gluten-free eaters and non-eaters alike. The use of Bob’s Redmill 1 to 1 Gluten Free Flour ensures that you get the best texture without compromising flavor. Plus, they can easily be adapted to be dairy-free!
Why You’ll Love This Recipe
- Fluffy Texture: These waffles turn out light and airy, providing a satisfying bite.
- Easy Preparation: With simple ingredients and straightforward steps, anyone can whip these up in no time.
- Versatile Serving Options: Serve with fresh fruit, maple syrup, or even yogurt for a delicious breakfast.
- Dairy-Free Option: Simply substitute plant-based milk for whole milk to cater to dietary preferences.
- Batch Friendly: Make extra batter and store it! Enjoy fresh waffles again in just minutes.
Tools and Preparation
To make these scrumptious gluten free waffles, gather your tools and prepare your workspace. Having the right equipment will make the process smooth and enjoyable.
Essential Tools and Equipment
- Waffle iron
- Mixing bowl
- Measuring cups
- Whisk
- Ladle or measuring cup
Importance of Each Tool
- Waffle iron: Essential for creating the perfect waffle shape with crisp edges.
- Mixing bowl: Provides ample space to combine dry and wet ingredients without mess.
- Whisk: Helps mix batter thoroughly ensuring even texture.
Ingredients
Dry Ingredients
- 2 cups gluten free flour (I used Bob’s RedMill 1:1)
- 3 tablespoons sugar
- 1 tablespoon baking powder
- 1 teaspoon sea salt
Wet Ingredients
- 1.25 cups whole milk (add up to 1/4 cup more to smooth out your batter)
- 3 tablespoons canola oil (melted coconut oil works well too)
- 2 large eggs
- 1 tablespoon vanilla
How to Make The Best Gluten Free Waffles
Step 1: Prepare the Dry Ingredients
In your mixing bowl, whisk together the gluten free flour, sugar, baking powder, and salt until fully combined.
Step 2: Mix the Wet Ingredients
In a large measuring cup:
Combine 3 tablespoons of oil (canola or melted coconut oil) with vanilla extract and milk.
Whisk in the eggs until everything is mixed well.
Step 3: Combine Wet and Dry Mixtures
Pour the liquid ingredients into the dry mixture:
Stir gently until just combined. It’s okay if there are small lumps; avoid overmixing.
If needed, add a splash of milk to achieve a smooth pouring consistency.
Step 4: Preheat Your Waffle Iron
Turn on your waffle iron to heat it up:
Lightly spray with canola oil or nonstick cooking spray.
Once warm, use a measuring cup or ladle to pour about one cup of batter onto the hot surface.
Step 5: Cook Your Waffles
Follow your waffle maker’s instructions:
Look for indicators like lights that signal when they are ready.
Step 6: Serve Warm
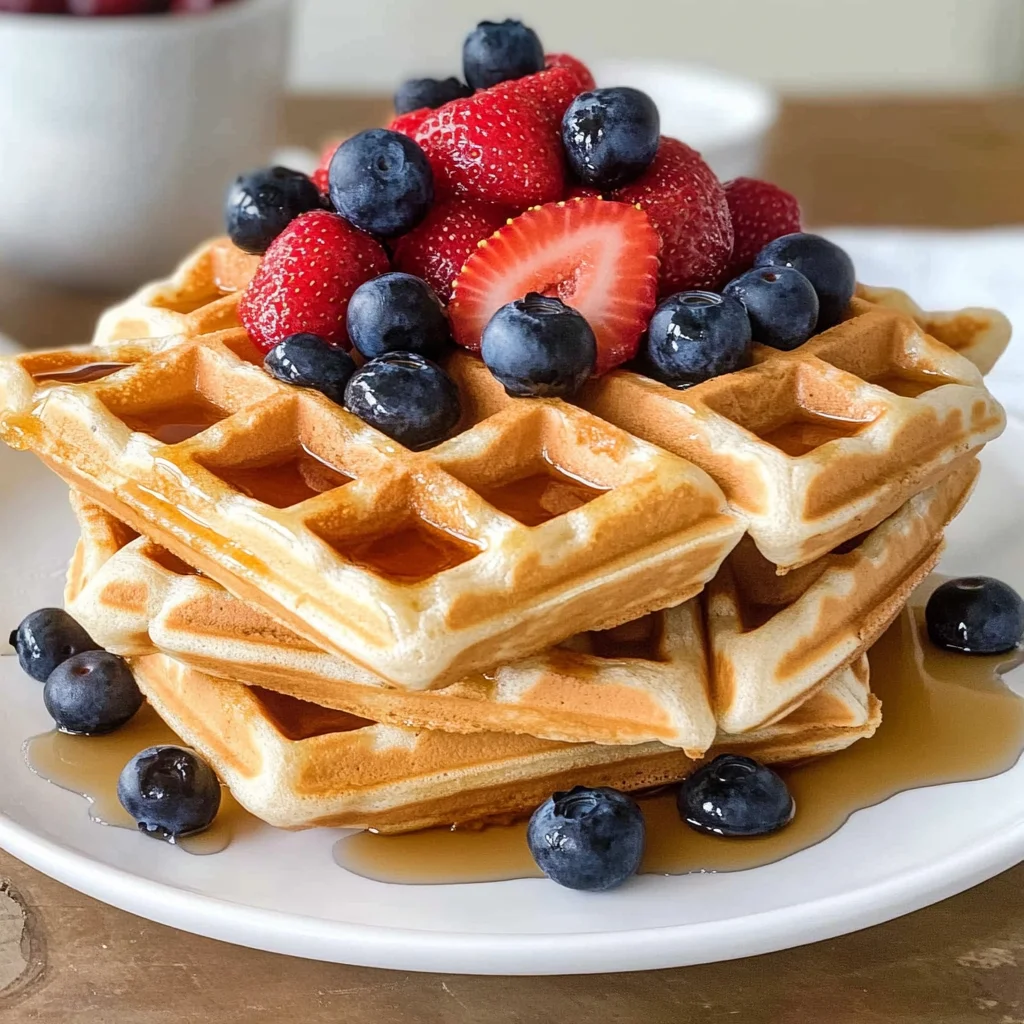
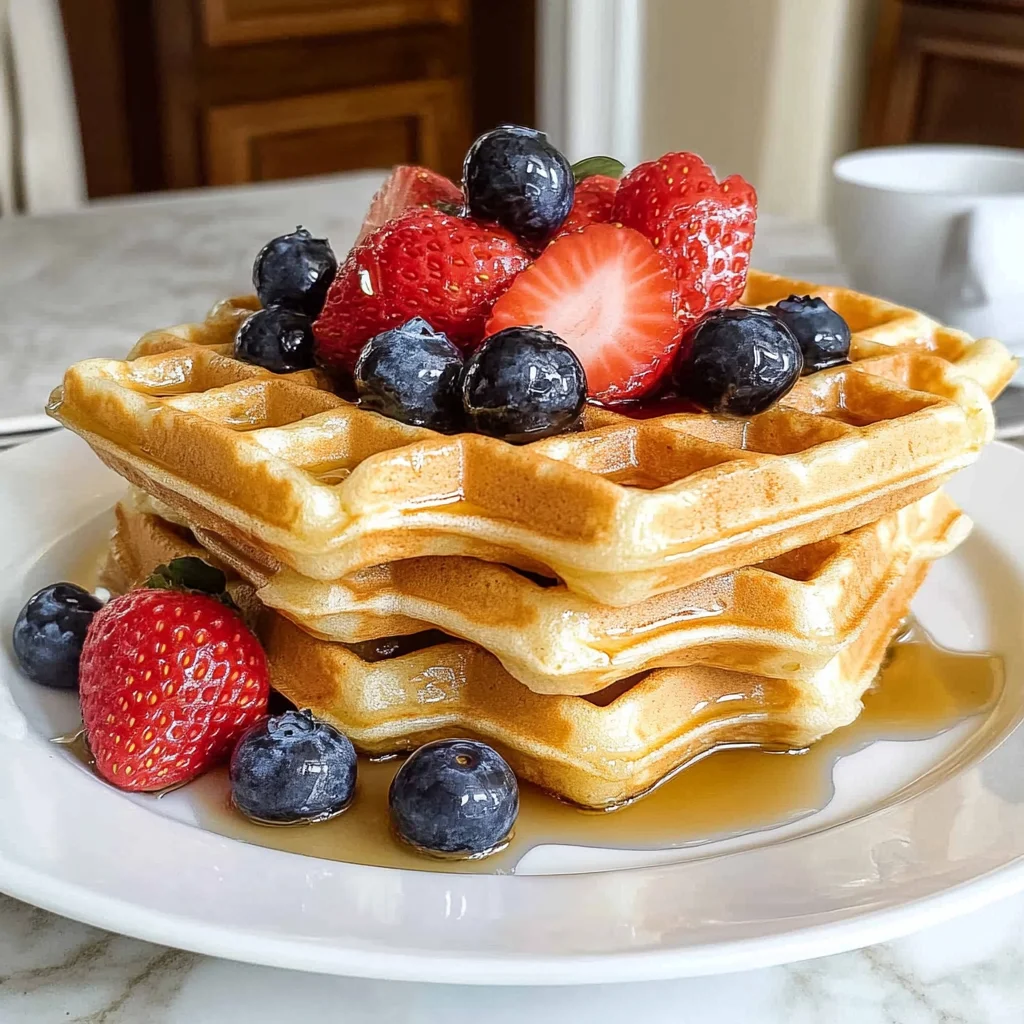
Top your waffles with fresh fruit and warm maple syrup for an indulgent breakfast!
Step 7: Storing Extras
If you have leftovers:
Store any remaining batter in an airtight container in the refrigerator for up to 2-3 days.
To refresh, simply scoop from the fridge into your preheated waffle iron when you’re ready!
How to Serve The Best Gluten Free Waffles
Serving The Best Gluten Free Waffles can elevate your breakfast experience. Whether you’re hosting friends or enjoying a quiet morning alone, these waffles can be paired with a variety of delicious toppings and sides to suit every taste.
Fresh Fruits
- Berries: Strawberries, blueberries, and raspberries add a burst of flavor and color.
- Banana Slices: Sweet and satisfying, bananas complement the waffles perfectly.
- Peach Slices: Juicy peaches bring a delightful sweetness that pairs well with maple syrup.
Syrups and Sauces
- Maple Syrup: A classic choice that enhances the natural flavors of the waffles.
- Chocolate Sauce: For those who love a sweeter touch, drizzle some chocolate sauce over your waffles.
- Caramel Sauce: Adds a rich, buttery flavor that can turn your breakfast into a dessert.
Whipped Toppings
- Whipped Cream: Light and airy, whipped cream adds a luxurious texture to each bite.
- Yogurt: A healthier alternative that offers creaminess along with probiotics.
How to Perfect The Best Gluten Free Waffles
To achieve the ultimate texture and flavor in your gluten free waffles, consider these helpful tips. Perfecting your recipe will ensure every batch is deliciously satisfying.
- Use Fresh Ingredients: Fresh baking powder ensures your waffles rise properly for that fluffy texture.
- Don’t Overmix the Batter: Mix until just combined; lumps are okay! Overmixing can lead to dense waffles.
- Preheat Your Waffle Iron: Ensure your waffle iron is hot before pouring in the batter for crispy edges.
- Experiment with Flavors: Add spices like cinnamon or nutmeg for an extra kick of flavor.
- Adjust Liquid as Needed: If your batter seems too thick, add a little more milk for better consistency.
- Serve Immediately: For best results, serve waffles right after cooking while they are still warm.
Best Side Dishes for The Best Gluten Free Waffles
Pairing side dishes with your gluten free waffles can create a delightful breakfast spread. Here are some excellent options to consider:
- Scrambled Eggs: Fluffy scrambled eggs provide protein and balance out the sweetness of the waffles.
- Bacon or Sausage: Crispy bacon or savory sausage links add a salty contrast to sweet toppings.
- Greek Yogurt Parfait: Layer yogurt with fruits and granola for a refreshing side that complements waffles well.
- Smoothie Bowl: A smoothie bowl packed with fruits provides vitamins and keeps your meal light yet filling.
- Avocado Toast: Creamy avocado on toast adds healthy fats and pairs beautifully with sweet waffles.
- Cottage Cheese with Pineapple: This combination offers protein along with tropical sweetness for variety in flavors.
Common Mistakes to Avoid
Making The Best Gluten Free Waffles can be easy, but a few common mistakes can lead to disappointing results. Here are some things to watch out for:
- Not measuring flour correctly: Too much or too little flour can affect the texture of your waffles. Use a kitchen scale or the spoon-and-level method for accuracy.
- Overmixing the batter: Mixing too much can lead to tough waffles. Mix just until combined and leave some lumps for fluffy results.
- Skipping the oil or butter: Fat helps create crispy edges. Don’t skip this ingredient; it’s essential for texture and flavor.
- Ignoring waffle iron instructions: Each waffle maker is different. Always refer to your machine’s instructions for optimal cooking time and temperature.
- Using cold ingredients: Cold ingredients can result in uneven cooking. Make sure your eggs and milk are at room temperature before combining them.
Storage & Reheating Instructions
Refrigerator Storage
- Store leftover batter in an airtight container in the fridge for up to 2-3 days.
- Cooked waffles can be kept in a sealed container for about 3-4 days.
Freezing The Best Gluten Free Waffles
- Freeze cooked waffles in a single layer on a baking sheet before transferring them to a freezer bag.
- They will stay fresh for up to 2 months in the freezer.
Reheating The Best Gluten Free Waffles
- Oven: Preheat oven to 350°F (175°C) and bake waffles for about 10 minutes until heated through.
- Microwave: Heat each waffle for about 30 seconds or until warm, but be aware they might lose crispiness.
- Stovetop: Heat in a skillet over medium heat for about 2-3 minutes on each side.
Frequently Asked Questions
Here are some common questions regarding The Best Gluten Free Waffles:
Can I make these waffles dairy-free?
Yes, simply substitute whole milk with your favorite plant-based milk, such as almond or oat milk.
How can I customize the flavor of my gluten-free waffles?
You can add spices like cinnamon or nutmeg, or mix in chocolate chips or blueberries for extra flavor.
What is the best gluten-free flour to use?
Bob’s RedMill 1-to-1 Gluten Free Flour works wonderfully, giving you great texture without compromising taste.
How do I know when my waffles are done?
Most waffle makers have indicator lights. If yours doesn’t, look for a golden brown color and crispy edges.
Can I prepare the batter ahead of time?
Absolutely! You can prepare the batter and store it in the refrigerator for up to 2-3 days before cooking.
Final Thoughts
These Best Gluten Free Waffles are not only delicious but also versatile. You can customize them with various toppings or mix-ins to suit your taste. Whether you enjoy them with syrup, fruit, or whipped cream, they are sure to please everyone at breakfast. Give this recipe a try, and enjoy the comfort of homemade waffles!
The Best Gluten Free Waffles
- Prep Time: 10 minutes
- Cook Time: 15 minutes
- Total Time: 25 minutes
- Yield: Approximately 4 servings 1x
- Category: Breakfast
- Method: Baking
- Cuisine: American
Description
Indulge in the delightful experience of homemade waffles with this recipe for The Best Gluten Free Waffles. Fluffy on the inside and crispy on the outside, these waffles are perfect for anyone, whether they follow a gluten-free diet or not. Made with Bob’s RedMill 1-to-1 Gluten Free Flour, they ensure an unforgettable texture and flavor. Plus, they can easily be adapted to be dairy-free! Serve them warm with fresh fruits, maple syrup, or whipped cream for a breakfast that will please everyone at your table.
Ingredients
- 2 cups Bob's RedMill 1:1 Gluten Free Flour
- 3 tablespoons sugar
- 1 tablespoon baking powder
- 1 teaspoon sea salt
- 1.25 cups whole milk (or plant-based milk)
- 3 tablespoons canola oil (or melted coconut oil)
- 2 large eggs
- 1 tablespoon vanilla extract
Instructions
- In a mixing bowl, whisk together the flour, sugar, baking powder, and salt.
- In a separate measuring cup, mix the oil, vanilla extract, and milk; then whisk in the eggs until combined.
- Pour the wet mixture into the dry ingredients and stir gently until just combined; small lumps are okay.
- Preheat your waffle iron and lightly spray it with nonstick cooking spray.
- Pour about one cup of batter onto the heated waffle iron and cook according to manufacturer's instructions until golden brown.
- Serve immediately topped with your favorite fruits, syrups, or whipped cream!
Nutrition
- Serving Size: 1 waffle (approx. 90g)
- Calories: 260
- Sugar: 8g
- Sodium: 300mg
- Fat: 10g
- Saturated Fat: 1g
- Unsaturated Fat: 9g
- Trans Fat: 0g
- Carbohydrates: 38g
- Fiber: 2g
- Protein: 6g
- Cholesterol: 70mg